参考文章
https://blog.csdn.net/foreverdingleo/article/details/79914150
官方文档:
Installing kubeadm
create-cluster-kubeadm
环境信息
操作环境
操作环境:DSM916+8G,创建虚拟机
| 虚机名称 | CPU配置 | 内存配置 |
|---|---|---|
| k8s-m1 | 2核 | 1500M |
| k8s-n1 | 2核 | 1G |
| k8s-n2 | 2核 | 1G |
| k8s-n3 | 2核 | 1G |
操作系统:FedoraServer28
全部使用root操作
节点信息
内网环境,全部使用192.168.2.x 网段IP
编辑/etc/hosts添加如下内容
192.168.2.186 k8s-m1

192.168.2.189 k8s-n1
192.168.2.190 k8s-n2
192.168.2.191 k8s-n3
关闭防火墙与SELinux
#systemctl stop firewalld && systemctl disable firewalld
#setenforce 0
#vi /etc/selinux/config
SELINUX=disabled
FedoraServer dnf配置
编辑/etc/resolv.conf文件,添加如下内容:
nameserver 180.76.76.76
这里使用百度的DNS。
然后修改/etc/dnf/dnf.conf文件,添加如下内容:
fastestmirror=true
然后执行dnf upgrade更新最新的内核版本和软件版本
docker版本
按照fedora28升级docker为最新社区版方法的方法升级docker版本为docker社区最新版。升级完成之后的版本信息如下:
[root@k8s-m1 wangxianfeng]# docker version
Client:
 Version:      18.05.0-ce
 API version:  1.37
 Go version:   go1.9.5
 Git commit:   f150324
 Built:        Wed May  9 22:16:04 2018
 OS/Arch:      linux/amd64
 Experimental: false
 Orchestrator: swarm

Server:
 Engine:
  Version:      18.05.0-ce
  API version:  1.37 (minimum version 1.12)
  Go version:   go1.9.5
  Git commit:   f150324
  Built:        Wed May  9 22:19:55 2018
  OS/Arch:      linux/amd64
  Experimental: false
所有节点需要设定/etc/sysctl.d/k8s.conf的系统参数
cat <<EOF > /etc/sysctl.d/k8s.conf
net.ipv4.ip_forward = 1
net.bridge.bridge-nf-call-ip6tables = 1
net.bridge.bridge-nf-call-iptables = 1
EOF

sysctl -p /etc/sysctl.d/k8s.conf
关闭系统Swap
Kubernetes v1.8+ 要求关闭系统 Swap,若不关闭则需要修改 kubelet 设定参数,在所有节点利用以下指令关闭:
swapoff -a && sysctl -w vm.swappiness=0
记得/etc/fstab也要注解掉SWAP挂载,以下部分注释掉
#/dev/mapper/fedora-swap swap swap defaults 0 0
软件安装与配置
配置kubernetes yum源
cat >> /etc/yum.repos.d/kubernetes.repo <<EOF
[kubernetes]
name=Kubernetes
baseurl=https://mirrors.aliyun.com/kubernetes/yum/repos/kubernetes-el7-x86_64/
enabled=1
gpgcheck=0
EOF
安装kubeadm kubelet kubectl
dnf install kubeadm kubelet kubectl
安装的软件版本是1.10.3
cgroup参数确认,并修改成一致
kubelet的cgroup驱动参数需要和docker使用的一致,先查询下docker的cgroup驱动参数是否与kubelet的一致。
[root@k8s-m1 wangxianfeng]# docker info |grep cgroup
Cgroup Driver: cgroupfs
[root@k8s-m1 wangxianfeng]# cat /etc/systemd/system/kubelet.service.d/10-kubeadm.conf |grep cgroup
Environment="KUBELET_CGROUP_ARGS=--cgroup-driver=systemd"

修改kubelet的cgroup为cgroupfs
sed -i "s/cgroup-driver=systemd/cgroup-driver=cgroupfs/g" /etc/systemd/system/kubelet.service.d/10-kubeadm.conf
载入配置,启动kubelet
在启动kubeadm之前,一定要先启动kubelet
systemctl daemon-reload
systemctl start kubelet

设置kubelet开机启动
systemctl enable kubelet
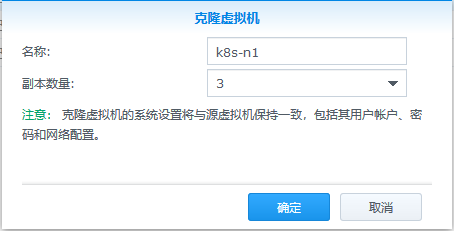
拍摄快照,开始分支
下面开始,分别操作Master节点和Node节点,master节点和node节点配置不同,因此,开始拍摄快照,克隆虚拟机,按照节点配置,配置虚拟机的hostname和IP。
192.168.2.189 k8s-n1
192.168.2.190 k8s-n2
192.168.2.191 k8s-n3
首先关闭k8s-m1虚机,准备拍摄快照,做个备份。然后克隆出3台虚机,修改内存配置为1G。

修改主机名和IP地址
依次启动虚拟机,分别修改如下2个参数:
# 主机名
vi /etc/hostname
k8s-n1
# IP地址
vi /etc/sysconfig/network-scripts/ifcfg-ens3
IPADDR=192.168.2.189
其他2个节点操作类似,完成之后reboot,使修改生效。启动k8s-m1 master虚机。

启动Master节点
折腾了几次,每次都需要重新下载docker镜像,最终学乖了,首先把docker镜像下载下来,然后拍摄个快照,下次不行就恢复快照,就不用每次都下载了。[已经包含后面安装网络插件所需要安装的docker镜像]
docker pull k8s.gcr.io/kube-proxy-amd64:v1.10.3
docker pull k8s.gcr.io/kube-controller-manager-amd64:v1.10.3
docker pull k8s.gcr.io/kube-apiserver-amd64:v1.10.3
docker pull k8s.gcr.io/kube-scheduler-amd64:v1.10.3
docker pull k8s.gcr.io/etcd-amd64:3.1.12
docker pull quay.io/coreos/flannel:v0.10.0-amd64
docker pull k8s.gcr.io/k8s-dns-dnsmasq-nanny-amd64:1.14.8
docker pull k8s.gcr.io/k8s-dns-sidecar-amd64:1.14.8
docker pull k8s.gcr.io/k8s-dns-kube-dns-amd64:1.14.8
docker pull k8s.gcr.io/pause-amd64:3.1
docker镜像下载之后,在k8s-m1节点上执行以下操作:
kubeadm init --kubernetes-version=1.10.3 --token-ttl 0 --pod-network-cidr=10.244.0.0/16
该命令表示kubenetes集群版本号为v1.10.3,token的有效时间为0表示永久有效,容器的网络段为10.244.0.0/16,由于kubeadm安装方式只能用于建立最小可用集群,所以很多addon是没有集成的,包括网络插件,需要之后安装,但网段参数需要先行配置。
[root@k8s-m1 ~]# kubeadm init --kubernetes-version=1.10.3 --token-ttl 0 --pod-network-cidr=10.244.0.0/16
[init] Using Kubernetes version: v1.10.3
[init] Using Authorization modes: [Node RBAC]
[preflight] Running pre-flight checks.
        [WARNING SystemVerification]: docker version is greater than the most recently validated version. Docker version: 18.05.0-ce. Max validated version: 17.03
        [WARNING FileExisting-tc]: tc not found in system path
        [WARNING FileExisting-crictl]: crictl not found in system path
Suggestion: go get github.com/kubernetes-incubator/cri-tools/cmd/crictl
[certificates] Generated ca certificate and key.
[certificates] Generated apiserver certificate and key.
[certificates] apiserver serving cert is signed for DNS names [k8s-m1 kubernetes kubernetes.default kubernetes.default.svc kubernetes.default.svc.cluster.local] and IPs [10.96.0.1 192.168.2.186]
[certificates] Generated apiserver-kubelet-client certificate and key.
[certificates] Generated etcd/ca certificate and key.
[certificates] Generated etcd/server certificate and key.
[certificates] etcd/server serving cert is signed for DNS names [localhost] and IPs [127.0.0.1]
[certificates] Generated etcd/peer certificate and key.
[certificates] etcd/peer serving cert is signed for DNS names [k8s-m1] and IPs [192.168.2.186]
[certificates] Generated etcd/healthcheck-client certificate and key.
[certificates] Generated apiserver-etcd-client certificate and key.
[certificates] Generated sa key and public key.
[certificates] Generated front-proxy-ca certificate and key.
[certificates] Generated front-proxy-client certificate and key.
[certificates] Valid certificates and keys now exist in "/etc/kubernetes/pki"
[kubeconfig] Wrote KubeConfig file to disk: "/etc/kubernetes/admin.conf"
[kubeconfig] Wrote KubeConfig file to disk: "/etc/kubernetes/kubelet.conf"
[kubeconfig] Wrote KubeConfig file to disk: "/etc/kubernetes/controller-manager.conf"
[kubeconfig] Wrote KubeConfig file to disk: "/etc/kubernetes/scheduler.conf"
[controlplane] Wrote Static Pod manifest for component kube-apiserver to "/etc/kubernetes/manifests/kube-apiserver.yaml"
[controlplane] Wrote Static Pod manifest for component kube-controller-manager to "/etc/kubernetes/manifests/kube-controller-manager.yaml"
[controlplane] Wrote Static Pod manifest for component kube-scheduler to "/etc/kubernetes/manifests/kube-scheduler.yaml"
[etcd] Wrote Static Pod manifest for a local etcd instance to "/etc/kubernetes/manifests/etcd.yaml"
[init] Waiting for the kubelet to boot up the control plane as Static Pods from directory "/etc/kubernetes/manifests".
[init] This might take a minute or longer if the control plane images have to be pulled.
[apiclient] All control plane components are healthy after 60.510324 seconds
[uploadconfig] Storing the configuration used in ConfigMap "kubeadm-config" in the "kube-system" Namespace
[markmaster] Will mark node k8s-m1 as master by adding a label and a taint
[markmaster] Master k8s-m1 tainted and labelled with key/value: node-role.kubernetes.io/master=""
[bootstraptoken] Using token: 14ylj1.bdo740sacxsceji4
[bootstraptoken] Configured RBAC rules to allow Node Bootstrap tokens to post CSRs in order for nodes to get long term certificate credentials
[bootstraptoken] Configured RBAC rules to allow the csrapprover controller automatically approve CSRs from a Node Bootstrap Token
[bootstraptoken] Configured RBAC rules to allow certificate rotation for all node client certificates in the cluster
[bootstraptoken] Creating the "cluster-info" ConfigMap in the "kube-public" namespace
[addons] Applied essential addon: kube-dns
[addons] Applied essential addon: kube-proxy

Your Kubernetes master has initialized successfully!

To start using your cluster, you need to run the following as a regular user:

  mkdir -p $HOME/.kube
  sudo cp -i /etc/kubernetes/admin.conf $HOME/.kube/config
  sudo chown $(id -u):$(id -g) $HOME/.kube/config

You should now deploy a pod network to the cluster.
Run "kubectl apply -f [podnetwork].yaml" with one of the options listed at:
  https://kubernetes.io/docs/concepts/cluster-administration/addons/

You can now join any number of machines by running the following on each node
as root:

  kubeadm join 192.168.2.186:6443 --token 14ylj1.bdo740sacxsceji4 --discovery-token-ca-cert-hash sha256:3eb62343888af91eac138a779b2b8b45c42171e965c83fdfb6a5ee60f64dacae
经过几次的折腾,终于看到成功的消息了,好激动。
主要修改了以下几点:
1. 虚机内存之前给的有点小,只有1G,现在给了3G
2. docker的cgroup与kubelet的要一致,全部改成了cgroupfs
安装网络插件Pod
在成功启动Master节点后,在添加node节点之前,需要先安装网络管理插件,kubernetes可供选择的网络插件有很多,
如Calico,Canal,flannel,Kube-router,Romana,Weave Net
各种安装教程可以参考官方文档,create-cluster-kubeadm
首先需要执行
export KUBECONFIG=/etc/kubernetes/admin.conf
然后执行:
kubectl apply -f https://raw.githubusercontent.com/coreos/flannel/v0.10.0/Documentation/kube-flannel.yml
否则会有如下提示:
[root@k8s-m1 ~]# kubectl apply -f https://raw.githubusercontent.com/coreos/flannel/v0.10.0/Documentation/kube-flannel.yml
The connection to the server localhost:8080 was refused - did you specify the right host or port?
成功提示如下:
[root@k8s-m1 ~]# kubectl apply -f https://raw.githubusercontent.com/coreos/flannel/v0.10.0/Documentation/kube-flannel.yml
clusterrole.rbac.authorization.k8s.io "flannel" created
clusterrolebinding.rbac.authorization.k8s.io "flannel" created
serviceaccount "flannel" created
configmap "kube-flannel-cfg" created
daemonset.extensions "kube-flannel-ds" created
安装完成后,执行:
kubectl get pods --all-namespaces
查看Pod的启动状态,一旦kube-dns Pod的启动状态为UP或者Running,集群就可以开始添加节点了。[终于看到全都是running了,搞了2周了都]
[wangxianfeng@k8s-m1 ~]$ kubectl get pods --all-namespaces
NAMESPACE     NAME                             READY     STATUS    RESTARTS   AGE
kube-system   etcd-k8s-m1                      1/1       Running   5          14h
kube-system   kube-apiserver-k8s-m1            1/1       Running   5          14h
kube-system   kube-controller-manager-k8s-m1   1/1       Running   5          14h
kube-system   kube-dns-86f4d74b45-k4w6j        3/3       Running   0          14h
kube-system   kube-flannel-ds-6fhxv            1/1       Running   1          14h
kube-system   kube-proxy-pqxtc                 1/1       Running   5          14h
kube-system   kube-scheduler-k8s-m1            1/1       Running   5          14h
启动node节点虚机,加入master
内存配置修改为2G,不启动那么多了,2台就够了。
根据上边提示,在k8s-n1上运行如下命令:
kubeadm join 192.168.2.186:6443 --token 14ylj1.bdo740sacxsceji4 --discovery-token-ca-cert-hash sha256:3eb62343888af91eac138a779b2b8b45c42171e965c83fdfb6a5ee60f64dacae
得到的结果如下:
[root@k8s-n1 wangxianfeng]# kubeadm join 192.168.2.186:6443 --token 14ylj1.bdo740sacxsceji4 --discovery-token-ca-cert-hash sha256:3eb62343888af91eac138a779b2b8b45c42171e965c83fdfb6a5ee60f64dacae
[preflight] Running pre-flight checks.
        [WARNING SystemVerification]: docker version is greater than the most recently validated version. Docker version: 18.05.0-ce. Max validated version: 17.03
        [WARNING FileExisting-tc]: tc not found in system path
        [WARNING FileExisting-crictl]: crictl not found in system path
Suggestion: go get github.com/kubernetes-incubator/cri-tools/cmd/crictl
[discovery] Trying to connect to API Server "192.168.2.186:6443"
[discovery] Created cluster-info discovery client, requesting info from "https://192.168.2.186:6443"
[discovery] Requesting info from "https://192.168.2.186:6443" again to validate TLS against the pinned public key
[discovery] Cluster info signature and contents are valid and TLS certificate validates against pinned roots, will use API Server "192.168.2.186:6443"
[discovery] Successfully established connection with API Server "192.168.2.186:6443"

This node has joined the cluster:
* Certificate signing request was sent to master and a response
  was received.
* The Kubelet was informed of the new secure connection details.

Run 'kubectl get nodes' on the master to see this node join the cluster.
看到了成功的,消息,很是高兴,然后再master上运行以下命令,确认一下,用root用户,得到如下结果:
kubectl get nodes
The connection to the server localhost:8080 was refused - did you specify the right host or port?
是因为没有执行如下命令:
export KUBECONFIG=/etc/kubernetes/admin.conf
再次执行命令就得到如下结果:
[wangxianfeng@k8s-m1 ~]$ kubectl get nodes
NAME      STATUS    ROLES     AGE       VERSION
k8s-m1    Ready     master    14h       v1.10.3
k8s-n1    Ready     <none>    1m        v1.10.3
不容易啊,全部都是Ready状态了。
当node节点全部是Ready状态的时候,需要下载如下镜像:
[root@k8s-n1 wangxianfeng]# docker images
REPOSITORY                    TAG                 IMAGE ID            CREATED             SIZE
k8s.gcr.io/kube-proxy-amd64   v1.10.3             4261d315109d        3 days ago          97.1MB
quay.io/coreos/flannel        v0.10.0-amd64       f0fad859c909        4 months ago        44.6MB
k8s.gcr.io/pause-amd64        3.1                 da86e6ba6ca1        5 months ago        742kB
如果早知道,可以提前下载:
docker pull k8s.gcr.io/kube-proxy-amd64:v1.10.3
docker pull quay.io/coreos/flannel:v0.10.0-amd64
docker pull k8s.gcr.io/pause-amd64:3.1
Kubernetes-Dashboard(WebUI)的安装
以下部分参考文章Kubernetes v1.10.x HA 全手动安装教程的dashboard部分
Dashboard 是 Kubernetes 社区官方开发的仪表板,有了仪表板后管理者就能够通过 Web-based 方式来管理 Kubernetes 集群,除了提升管理方便,也让资源视觉化,让人更直觉看见系统信息的呈现结果。
安装dashboard
在k8s-m1通过 kubectl 来建立 kubernetes dashboard 即可:
事先下载docker镜像:
docker pull k8s.gcr.io/kubernetes-dashboard-amd64:v1.8.3
然后执行以下指令:
kubectl apply -f https://raw.githubusercontent.com/kubernetes/dashboard/master/src/deploy/recommended/kubernetes-dashboard.yaml

[root@k8s-m1 wangxianfeng]# kubectl apply -f https://raw.githubusercontent.com/kubernetes/dashboard/master/src/deploy/recommended/kubernetes-dashboard.yaml
secret "kubernetes-dashboard-certs" created
serviceaccount "kubernetes-dashboard" created
role.rbac.authorization.k8s.io "kubernetes-dashboard-minimal" created
rolebinding.rbac.authorization.k8s.io "kubernetes-dashboard-minimal" created
deployment.apps "kubernetes-dashboard" created
service "kubernetes-dashboard" created

kubectl -n kube-system get po,svc -l k8s-app=kubernetes-dashboard


[root@k8s-m1 wangxianfeng]# kubectl -n kube-system get po,svc -l k8s-app=kubernetes-dashboard
NAME                                        READY     STATUS    RESTARTS   AGE
pod/kubernetes-dashboard-7d5dcdb6d9-m8fsk   1/1       Running   0          17s

NAME                           TYPE        CLUSTER-IP       EXTERNAL-IP   PORT(S)   AGE
service/kubernetes-dashboard   ClusterIP   10.107.179.170   <none>        443/TCP   17s
这边会额外建立一个名称为open-api Cluster Role Binding,这仅作为方便测试时使用,在一般情况下不要开启,不然就会直接被存取所有 API:
cat <<EOF | kubectl create -f -

apiVersion: rbac.authorization.k8s.io/v1

kind: ClusterRoleBinding

metadata:

  name: open-api

  namespace: ""

roleRef:

  apiGroup: rbac.authorization.k8s.io

  kind: ClusterRole

  name: cluster-admin

subjects:

  - apiGroup: rbac.authorization.k8s.io

    kind: User

    name: system:anonymous

EOF
注意!管理者可以针对特定使用者来开放 API 存取权限,但这边方便使用直接绑在 cluster-admin cluster role。
浏览器访问
完成后,就可以通过浏览器访问dashboard
浏览器访问地址:
https://192.168.2.186:6443/api/v1/namespaces/kube-system/services/https:kubernetes-dashboard:/proxy/
在 1.7 版本以后的 Dashboard 将不再提供所有权限,因此需要建立一个 service account 来绑定 cluster-admin role:
[root@k8s-m1 wangxianfeng]# kubectl -n kube-system create sa dashboard
serviceaccount "dashboard" created
[root@k8s-m1 wangxianfeng]# kubectl create clusterrolebinding dashboard --clusterrole cluster-admin --serviceaccount=kube-system:dashboard
clusterrolebinding.rbac.authorization.k8s.io "dashboard" created
[root@k8s-m1 wangxianfeng]# SECRET=$(kubectl -n kube-system get sa dashboard -o yaml | awk '/dashboard-token/ {print $3}')
[root@k8s-m1 wangxianfeng]# kubectl -n kube-system describe secrets ${SECRET} | awk '/token:/{print $2}'
eyJhbGciOiJSUzI1NiIsImtpZCI6IiJ9.eyJpc3MiOiJrdWJlcm5ldGVzL3NlcnZpY2VhY2NvdW50Iiwia3ViZXJuZXRlcy5pby9zZXJ2aWNlYWNjb3VudC9uYW1lc3BhY2UiOiJrdWJlLXN5c3RlbSIsImt1YmVybmV0ZXMuaW8vc2VydmljZWFjY291bnQvc2VjcmV0Lm5hbWUiOiJkYXNoYm9hcmQtdG9rZW4temNiOXQiLCJrdWJlcm5ldGVzLmlvL3NlcnZpY2VhY2NvdW50L3NlcnZpY2UtYWNjb3VudC5uYW1lIjoiZGFzaGJvYXJkIiwia3ViZXJuZXRlcy5pby9zZXJ2aWNlYWNjb3VudC9zZXJ2aWNlLWFjY291bnQudWlkIjoiZDczNzBmMTQtNjA1My0xMWU4LWE0MDctMDIxMTMyMmI4OGUzIiwic3ViIjoic3lzdGVtOnNlcnZpY2VhY2NvdW50Omt1YmUtc3lzdGVtOmRhc2hib2FyZCJ9.Srzmt9hgpZ1ziNs6mqc_Bewo6PllcB2N92Zyq_EiCqV42PH9CPhNnHjTwcuxJ3rsJVVQUBW7V7V92zkKnOC5wCokIFJ526-CO8u901mj8tD9r2hEwvlukY0aP9BLDcpJKDCOKWXzryeLWWXb2s2Ydq_TJ8yy_EaPyFEKB903fXK6Vuhrg1XRgWwmVG4oSKbgnBJ5vjysvoud_YP-4gyIpSca6fq81t9IJ63oOcN65vQ3ct7qRvZ9-XD9nhk5znZg-DPcCVu4wmM35t2QLvlnmJLEMUgHX_bAxFCdtvfTO_kEo7ZIYBGJ8f2RlbHzKDYBGTLZWp_fUT9neKHGHwauKg
复制token,然后贴到 Kubernetes dashboard。注意这边一般来说要针对不同 User 开启特定存取权限。


把dashboard用frp穿透出去
穿透出去就可以用外网访问了,可以随时随地看看,配置如下:
[k8s-dashboard]
type=https
custom_domains=dashboard.aiuyo.com
local_ip=192.168.2.186
local_port=6443
use_encryption=true
use_compression=true
穿透之后的访问地址是dashboard:
https://dashboard.aiuyo.com/api/v1/namespaces/kube-system/services/https:kubernetes-dashboard:/proxy/#!/overview?namespace=default

令牌:

eyJhbGciOiJSUzI1NiIsImtpZCI6IiJ9.eyJpc3MiOiJrdWJlcm5ldGVzL3NlcnZpY2VhY2NvdW50Iiwia3ViZXJuZXRlcy5pby9zZXJ2aWNlYWNjb3VudC9uYW1lc3BhY2UiOiJrdWJlLXN5c3RlbSIsImt1YmVybmV0ZXMuaW8vc2VydmljZWFjY291bnQvc2VjcmV0Lm5hbWUiOiJkYXNoYm9hcmQtdG9rZW4temNiOXQiLCJrdWJlcm5ldGVzLmlvL3NlcnZpY2VhY2NvdW50L3NlcnZpY2UtYWNjb3VudC5uYW1lIjoiZGFzaGJvYXJkIiwia3ViZXJuZXRlcy5pby9zZXJ2aWNlYWNjb3VudC9zZXJ2aWNlLWFjY291bnQudWlkIjoiZDczNzBmMTQtNjA1My0xMWU4LWE0MDctMDIxMTMyMmI4OGUzIiwic3ViIjoic3lzdGVtOnNlcnZpY2VhY2NvdW50Omt1YmUtc3lzdGVtOmRhc2hib2FyZCJ9.Srzmt9hgpZ1ziNs6mqc_Bewo6PllcB2N92Zyq_EiCqV42PH9CPhNnHjTwcuxJ3rsJVVQUBW7V7V92zkKnOC5wCokIFJ526-CO8u901mj8tD9r2hEwvlukY0aP9BLDcpJKDCOKWXzryeLWWXb2s2Ydq_TJ8yy_EaPyFEKB903fXK6Vuhrg1XRgWwmVG4oSKbgnBJ5vjysvoud_YP-4gyIpSca6fq81t9IJ63oOcN65vQ3ct7qRvZ9-XD9nhk5znZg-DPcCVu4wmM35t2QLvlnmJLEMUgHX_bAxFCdtvfTO_kEo7ZIYBGJ8f2RlbHzKDYBGTLZWp_fUT9neKHGHwauKg
Heapster
Heapster是Kubernetes社区维护的容器集群监控与效能分析工具。Heapster 会从 Kubernetes apiserver 取得所有 Node 信息,然后再通过这些 Node 来取得 kubelet 上的资料,最后再将所有收集到资料送到 Heapster 的后台储存 InfluxDB,最后利用 Grafana 来抓取 InfluxDB 的资料源来进行视觉化。
首先在k8s-m1上git下载heapster的源码
git clone https://github.com/kubernetes/heapster.git
然后执行如下命令:
cd heapster
kubectl create -f deploy/kube-config/influxdb/
kubectl create -f deploy/kube-config/rbac/heapster-rbac.yaml
等全部服务启动完毕之后,即可通过浏览器访问Heapster


文章评论